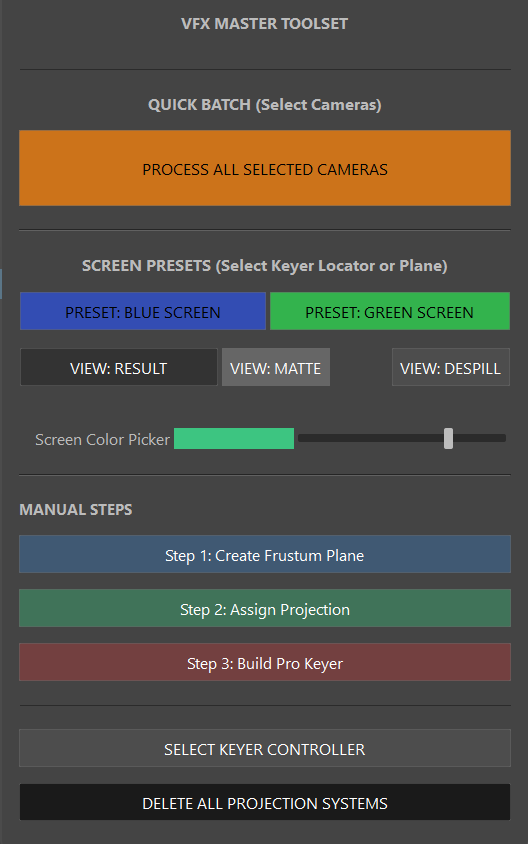
- 1PROCESS ALL SELECTED CAMERAS (Quick Batch)
Select any number of cameras and click this. The script will automatically generate frustum planes, assign projections, and build the full compositing node keyer networks for all of them instantly in one click.
- 2PRESET: BLUE SCREEN
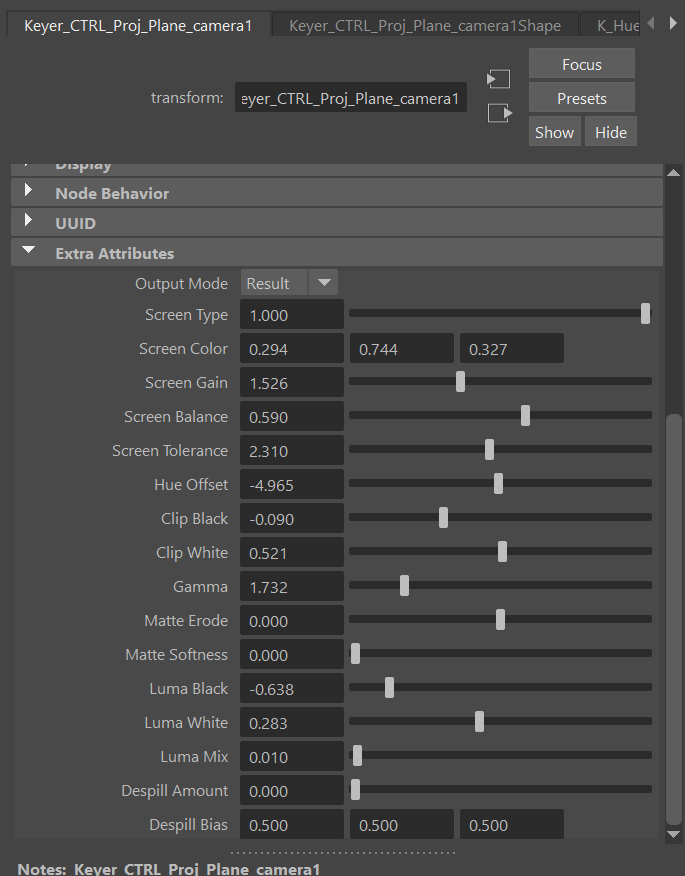
Select the Keyer Controller (locator) and click this to instantly tune the node graph math for Blue Screen extraction. Changes the internal Screen Type and Screen Color targets to pure Blue (0, 0, 1).
- 3PRESET: GREEN SCREEN
Select the Keyer Controller and click this to optimize the math for Green Screen extraction. Changes the Screen Type and Screen Color to pure Green (0, 1, 0) and slightly lowers Screen Gain to compensate for digital green luminosity.
- 4VIEW MODES (Result, Matte, Despill)
Three buttons that instantly toggle the shader output in Maya's viewport without rebuilding the network.
• VIEW: RESULT - Shows the final despilled RGB plate multiplied by the extracted alpha.
• VIEW: MATTE - Displays the black-and-white alpha channel extraction.
• VIEW: DESPILL - Shows the raw RGB plate with green/blue spill suppressed but no transparency applied. - 5SCREEN COLOR PICKER
If your physical green/blue screen is uneven, cyan-ish, or yellow-green, use this slider to pick the exact background color. The internal difference math scales against this custom color.
- 6MANUAL STEPS
Allows you to run the pipeline step-by-step instead of batching.
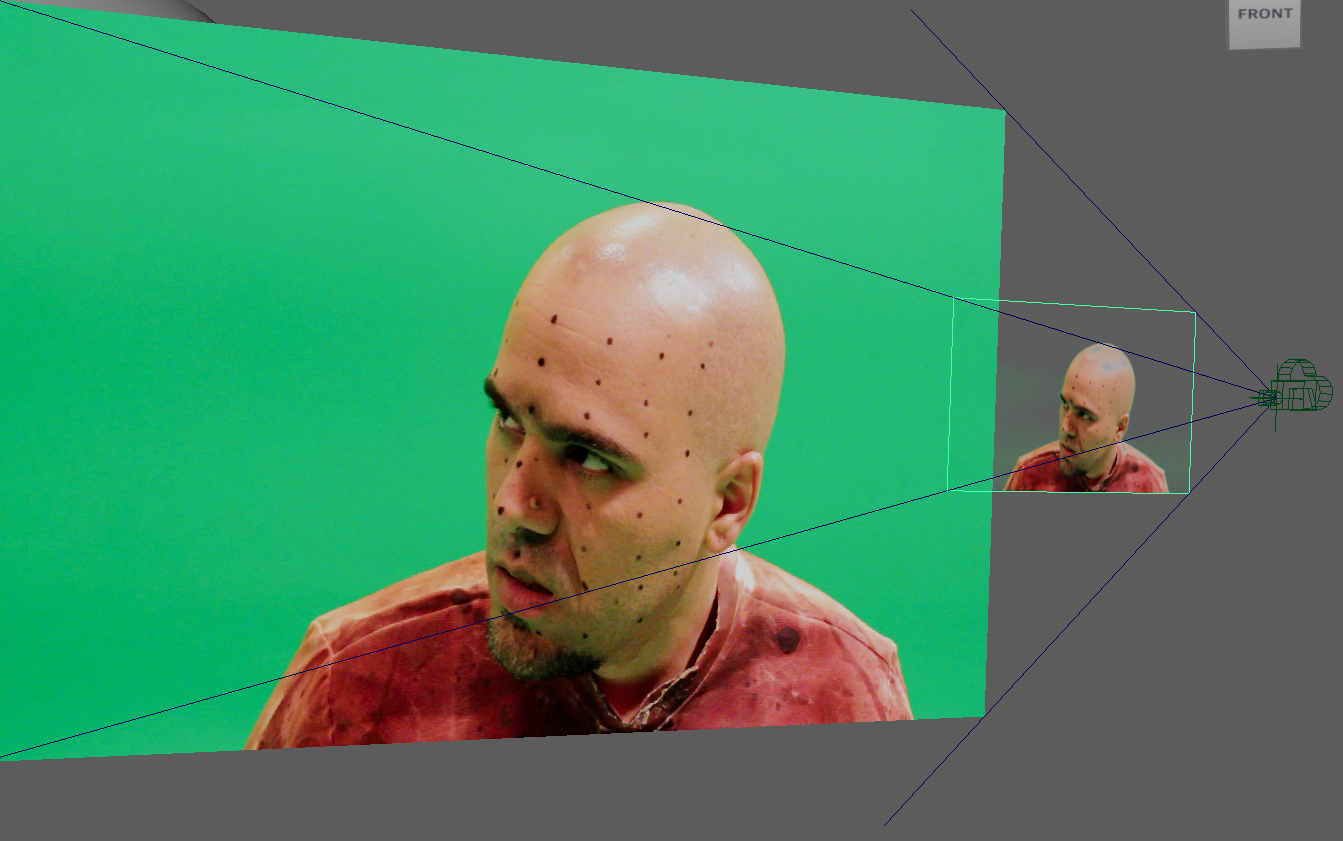
• Step 1: Create Frustum Plane - Builds a polyplane parented to the camera, scaling it perfectly to match the camera's film aperture and focal length.
• Step 2: Assign Projection - Wires the camera's image plane to a projection node and assigns it to the geometry.
• Step 3: Build Pro Keyer - Constructs the massive IBK-style compositing node network to replace the basic projection. - 7UTILITIES & CLEANUP
• SELECT KEYER CONTROLLER - If you have the geometry selected, click this to easily select the locator that contains all the advanced slider attributes.
• DELETE ALL PROJECTION SYSTEMS - Scans the scene and safely deletes all nodes, locators, and planes generated by the tool, returning your scene to a clean state.
• Close Tool - Closes the UI window.